If you’ve ever wondered how to change oil at home without making a mess or a mistake, you’re in the right place.
Learning this simple DIY skill can save you money and extend the life of your engine. It’s also a great first step toward doing more car maintenance at home.
Let’s break it down into beginner-friendly steps, with tips for safe oil disposal, tool prep, and filter replacement.
Tools for Oil Change at Home: What You’ll Need
To change car oil yourself, gather these basics:
- New engine oil (check your manual for what kind of oil your car needs)
- Compatible oil filter
- Oil pan and funnel
- Wrenches (for drain plug and filter)
- Car jack and jack stands or ramps
- Rags, gloves, and cardboard
- Drain plug washer (optional but recommended)
Pro Tip: Know the difference between full synthetic vs conventional oil—your engine might require one over the other. Use Mobil’s Oil Selector to double-check before buying.
Warm Engine vs Cold Oil Drain: Prep Before You Start
For best results, run your engine for about 3–5 minutes to warm up the oil. Warm oil drains more smoothly and carries away more gunk. Turn the engine off and let it cool just enough so it’s warm, and not hot.
Park on level ground, engage the parking brake, and place wheel chocks behind the tires for extra safety.
Step 1: Locate and Remove the Engine Oil Drain Plug
Use a car jack and jack stands to lift your vehicle securely. Never crawl underneath without proper support. Find the engine oil drain plug beneath the oil pan. Place your oil catch pan directly under it.
Loosen the bolt with a socket wrench, remove it by hand, and let the oil drain fully. Be patient and let gravity do its thing.
Step 2: Perform the Oil Filter Replacement
Next, remove the oil filter. It’s usually located near the drain plug. It may require a wrench or some elbow grease.
Check that the old rubber gasket came off with the filter. Lightly coat the gasket of the new filter with clean oil and screw it in by hand until snug (don’t overtighten).
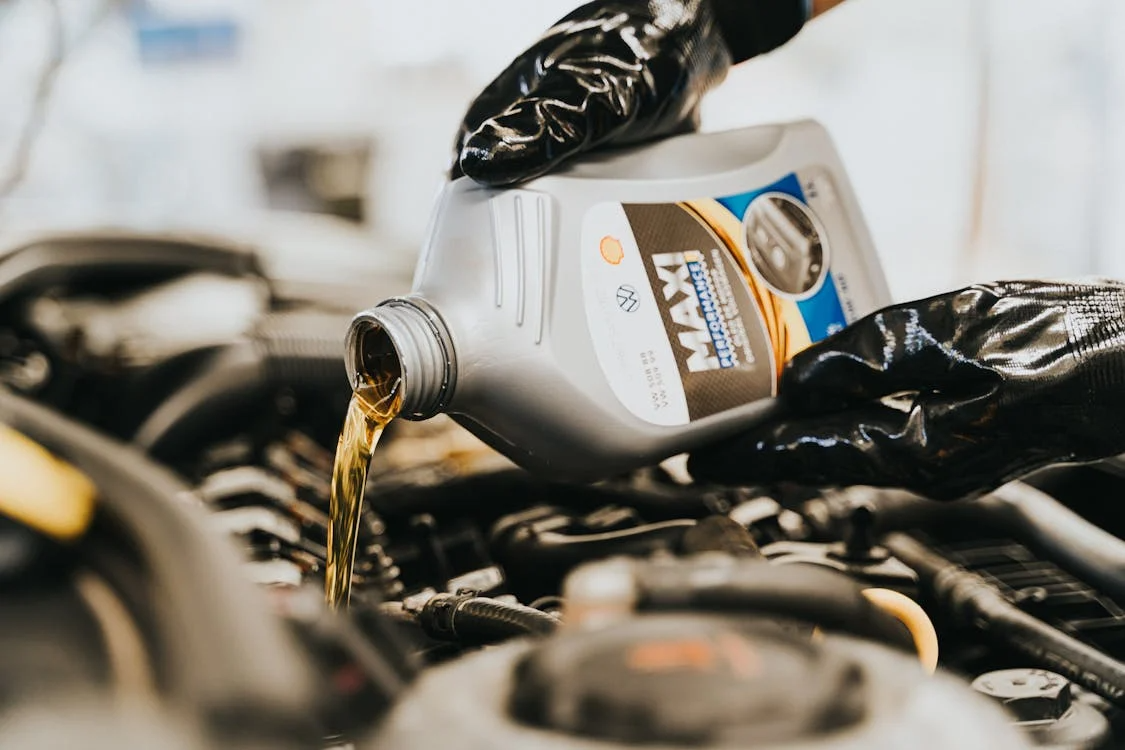
Step 3: Add New Oil and Check Dipstick Reading
Once the old oil has drained and the filter has been replaced, reinstall the drain plug and lower the car. Use a funnel to pour in fresh oil slowly. Check your dipstick reading periodically to avoid overfilling.
Most cars take 4 to 5 quarts, but always follow your owner’s manual.
Step 4: Start the Engine and Inspect
Let the engine idle for 2–3 minutes. Check underneath for leaks near the oil filter or drain plug.
Turn the engine off, let it sit for 30 seconds, then recheck the dipstick reading and top off if needed.
Oil Disposal Safety Tips
Never toss used oil or filters in the trash. They’re classified as hazardous waste. Instead, pour the used oil into a clean, sealed container (like the bottle your new oil came in).
Then, take it to a nearby auto parts store, service station, or recycling center. Most locations accept oil and filters for free. Always dispose of responsibly.
Need another DIY project? Check out our DIY Brake Pad Replacement Guide to keep your car stopping smoothly.
How Often Should You Change Your Oil?
Your oil change frequency depends on your driving habits, vehicle type, and the kind of oil you use. Most cars need an oil change every 5,000 to 7,500 miles, but newer engines running on full synthetic oil can sometimes go 10,000 miles or more.
If you’re driving in extreme heat, stop-and-go traffic, or towing frequently, you’ll want to change it sooner. Always watch for signs like engine noise, a dirty dipstick, or the oil change warning light.
Wrap It Up and Roll Out
Changing your own oil isn’t just a chore, but a confidence builder. Once you’ve done it, you’ll realize how easy it is to handle basic DIY oil change tasks, and you’ll be more in tune with your vehicle’s needs.
Ready to take control of your car care? Roll up your sleeves and start with oil.